1- Usefull websites
|

Left headings

Right headings

Sumaries

Side captions

Figures side by side
|
2- Usefull sofware
- Emacs... Does everything, edit LaTeX file,
spellchecking, coffee...
- Flyspell:
on the fly spellchecking for emacs: extremely useful.
- Kile: LaTeX source editor - TeX
shell - Gnuplot front end for KDE 3. I did not use this software to write my thesis because I discovered it very late in the process of writing. However, I have used it since and I find it more convenient than emacs, and you DO keep control on the LaTeX source.
- Xmgrace: WYSIWYG 2D plotting tool for the X Window System and M*tif. That's what I use for all my plots. By the way, it runs on windows as well (it's part of cygwin).
- Xfig: I use this figures. It's basic but it works and figures are clean. It's also part of cygwin on M$ windows.
- Jabref: graphical frontend to manage BibTeX databases. I find it great, no need to dig into BibTeX files, it does a very good job at maintaining a database, searching... It's in java so it should work on any platform.
|
3- Documentation available on this server
|
4- Packages I used
- natbib: for inserting citations in a human readable for
format. It also expands the Latex
\cite command to obtain citations such
as (merkel et al. 2000), merkel et al. (2000), (see Merkel et al. 2000) or Merkel et
al. 2000 within the same document. I have a small reference sheet here.
- To switch to french mode with TeteX (available on most linux platforms),
the commands are
\usepackage[latin1]{inputenc} % To use characters such as é without typing \'e
\usepackage[cyr]{aeguill} % To display characters such as é
\usepackage{xspace} % To get the right spacings in front of : and so on
\usepackage[french]{babel} % To get into french mode
- For the insertion of postscript figures
\usepackage{graphicx}
- I redefined my heading as follow
\usepackage{fancyheadings}

\pagestyle{fancyplain}

% Remember chapter title

\renewcommand{\chaptermark}[1]{\markboth{Chap. \thechapter:\ #1}{}}

% section number and title

\renewcommand{\sectionmark}[1]{\markright{\thesection\ #1}}

\lhead[\fancyplain{}{\bfseries\thepage}] %

    {\fancyplain{}{\bfseries\rightmark}}

\rhead[\fancyplain{}{\scshape\leftmark}] %

    {\fancyplain{}{\bfseries\thepage}}

\cfoot{}
You can see the resulting headings on this example.
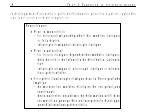
- I also created a small command to add summary boxes in the text
\newcommand{\resume}[1]{

\addcontentsline{toc}{section}{Résumé}

\begin{center}\fbox{\parbox{12cm}{\bf #1}}\end{center}}
You use it as follow:
\resume{

    Pour résumer:

    \begin{itemize}

    \item Pour un monocristal

    \item Pour un polycristal

    \end{itemize}

    }
You can see the result on this example.
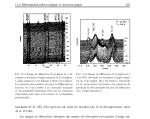
- I also wanted figures with captions on the side, the
sidecap
package does that
\usepackage{sidecap}
You use it as follow
\begin{SCfigure}[][t]

\includegraphics[width=8cm,clip]{figure.eps}

\caption[Short caption]{\label{thelabel} Long caption.}

\end{SCfigure}
You can see the result on this example.
- The spacings in the table of content and list of figures were too short,
you can configure that with the
tocloft package
\usepackage{tocloft}
My configurations were
% More space for figure numbers

\setlength{\cftfignumwidth}{3.0em}

% Space between elements of the list

\setlength{\cftbeforefigskip}{0.1cm}

% Space before chapter entries in the TOC

\setlength{\cftbeforechapskip}{0.2cm}

% Space before parts in the TOC

\setlength{\cftbeforepartskip}{0.7cm}
- Finally, I used the package
hyperref to
tune the PDF ouput (see below)
|
5- Creating PDF files with LaTeX
The simple way
Creating a PDF file with LaTeX is actually much easier than it sounds. The way to proceed is simple:
- Create the latex document
- LaTeX, create the dvi
latex file.tex
- Create a postscript file with
dvips, the trick is to include the fonts in the postscript so
they will look nice in PDF. You do it that way
dvips -o psfile.ps -Ppdf dvifile.dvi
- Use
ps2pdf to convert it to PDF. If your document is in A4, add -sPAPERSIZE=a4
in the command line. The complete command is
ps2pdf -sPAPERSIZE=a4 psfile.ps
And that's all, you'll have a nice PDF with correct fonts that can be read on unix, windows or macOS.
More tuning...
You can also tune the PDF file with the hyperref package (see the links
for a manual). The functions I used are as follow.
- Plain user of the package:
\usepackage[a4paper=true,ps2pdf=true,pagebackref=true]{hyperref}
This will add commands into the PDF to create a linked table of contents,
as well as links for the cross-references such as calls to figure and page
numbers
- The
a4paper option is easy to understand.
ps2pdf=true tells the compiler that you'll use ps2pdf
to create the PDF output.pagebackref=true is a great option, it adds page numbers
in the bibliography and links to the positions in the document where you
actually cite them.
- You can also add information about you document:
\hypersetup{

    pdftitle =

        The title of my PDF,

    pdfauthor =

        My name,

    pdfsubject=

        The subject,

    pdfkeywords =

        keyword1 keyword2 keyword3

}
- Finally, I also used colors:
\hypersetup{

    colorlinks = true,

    linkcolor = red,

    anchorcolor = red,

    citecolor = blue,

    filecolor = red,

    pagecolor = red,

    urlcolor = red

}
That will put some colors in the PDF documents to make the links more obvious to the reader.
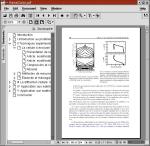
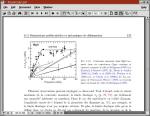
- See example 1, example 2, and example 3
for screenshots of the final PDF.
|

PDF with table of contents

PDF with color links

Color links in the bibliography
|


\usepackage[latin1]{inputenc}does not work properly, you should use\usepackage[latin1,applemac]{inputenc}instead.